A Simple Rule for When to Use a Dynamic vs a Static EQ.

So you’re working on a song and you’ve found a frequency which you want to adjust. Let’s say you want to nudge down 4.4k a little bit to reduce a bit of harshness. Now you ask yourself: what type of EQ should be used?

As time passes by, there becomes more and more dynamic EQ plugins available. Besides, in Ableton, Bitwig, and other DAWs, it’s easy to make any automatable EQ plugin act as dynamic by the use of envelope followers. On the other hand, when using a dynamic EQ plugin, there may be times when you want to use the bands as typical, with no reactivity.
So, we have a pretty much open choice of whether to use a static or dynamic EQ on a track we’re working on. So what to do?

Continue reading

Narrow Down Your Plugin Needs

So Many Plugins

Brand new plugins… promotional sales on plugins… they are SO tempting. But do you really need that new compressor plugin that just dropped?

In order to assess which plugin types are lacking in your toolbox, i recommend making a spreadsheet of all the plugins you own by category. You might discover, as i did, that you have such a vast variety of compressor options to choose from, it’s likely that you won’t benefit a whole lot from purchasing any more of them. You also might discover, like me, that you’re somewhat lacking in gate plugins, and could indeed benefit from picking up a few new models. Etc… Continue reading

An Alternative to True Peak Limiting: Not

True Peak Limiting is a method by which a limiter adjusts for how the digital waveform will be reconstructed by playback systems which can result in actual peak levels above 0dB even when the digital peak level is technically shown at below 0dB.

Implied Curvature

Basically the way intersample peaks occur is that the quantization points of a digital waveform can at times imply a curve between them which goes up a little bit higher than those actual sample points, resulting in a louder-than-expected actual peak level coming though.

To imagine it, just draw two dots in your mind, and then instead of drawing a straight line between them, draw a slightly curved line. The two dots are at a height of zero, and the curved line connecting them is bumping a little bit above zero. See?

Continue reading

All About Ableton’s Gate—A Pragmatic Guide

I found some old notes i had taken (for my own reference) about the parameters of Ableton’s Gate audio effect plugin and figured others could use the info as well, so i’ve polished ’em up, expanded on them a bunch, and dropped them here for you.

I’ve found that getting to know exactly how each parameter works with gate plugins leads to attaining desired results exponentially easier, and in particular learning how the more exotic parameters such as lookahead and hysteresis work facilitates sophisticated gate optimization.

Continue reading

A Limiter Tournament

So i set up a Limiter Tournament (using a variation on single elimination style) to decisively rank my Clipper/Limiter/Maximizer plugins against each other. Unlike with compression, which i often like to use for adding character, injecting density, and enhancing groove, my primary purpose for limiters tends to be to increase headroom by curtailing short transient peaks, leading to a consistent, clean output. For this reason, it is not so impractical for me to classify some limiters as “better” than other (unlike with compressors). This is also the reason why i am including clippers and limiters both in the same tournament. Limiters tend to pump and Clippers tend to distort, but lots of plugins have characteristics of both, and the basic purpose is the same for both: to reduce the pokiness of peaks which are so fast we don’t really hear them anyways. Maximizers? What the fuck are those? There is no consensus as different developers release things they call “maximizers” which do different things, but in general, they combine peak limiting with either low-level compression or saturation.

4 limiter/clipper/maximizer models at a time were pitted against each other in contests using HOFA BlindTest with clips gradually pushed into 35dB of limiting, gain-matched using Melda’s MAGC to be able to hear only dynamics, tone, and distortion characteristics without loudness levels affecting perception.

Continue reading

Animus Invidious on the AfroDJMac Music Production Podcast (+ new free effect racks)

I was super stoked to be a guest on the AfroDJMac Music Production Podcast. Here’s your chance to hear my actual, real-life voice(!) The sound quality on my side is not wonderful since i was recorded over skype, but whatexer. I had a great time chatting with Brian about random stuff… the conversation decided upon its own meandering path, touching on various topics including the crafting and sharing of Ableton Live racks, VST hoarding, my custom Elemental Mixing template channel strip database, workflow optimization, cassette processing, dynamic contrast between songs on albums, and even the Legend of Zelda (nerds). All in all it was a very invigorating experience and i definitely wouldn’t turn down being a guest again at some point in the future. I myself have quite enjoyed the other podcasts, as they contain a plethora of unconventional tips which are superb for kick-starting the creative juices.

Oh, and we also dropped a couple free audio effect racks for you to grab, including something i brainstormed up quite a while ago and finally implemented perfectly: ‘Dynamic Panning’ (compresses in one direction while it expands in the opposite for source-reactive width modification).

Check out AfroDJMac’s website to access the show.

“Bussification”

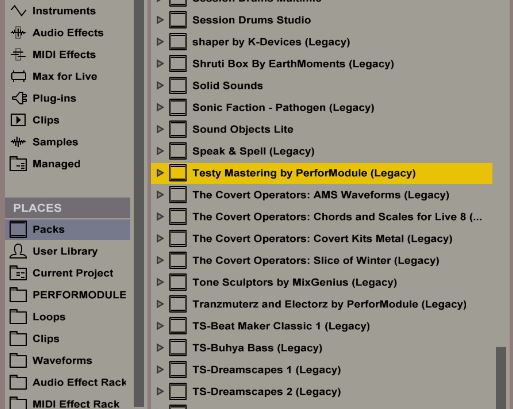
The newest sale pack is here: “Bussification”. It consists of channel strip racks designed for placement on groups of tracks, auxiliary tracks, and on the master buss during mixing. Each macro control for each is specifically restrained in minimum and maximum ranges to exemplify the relevant characteristics of different types of instruments.

Group Busses
By grouping similar instruments in a mix and placing different Bussification racks onto them, each is given a distinct frequency character “home”, leading to a clearer and more vibrant overall mix when applied carefully. For each buss, decide upon a frequency to enhance, in particular, to help it stand out. You can sculpt the brightness and darkness to fine-tune the resultant tone, remove unnecessary frequencies with “tauten”, and infuse parallel saturation. There is a “juice” control which determines overall intensity of various parameters, parallel saturation calibrated uniquely for each buss type, and finally a knob for natural-sounding, sophisticated level automation which works by balancing various internal parameters.

Auxiliary Busses
Set up two return channels (CMD/CTRL-ALT-T), one for “Dirt” and one for “Space”. Solo them and send just enough of each channel in the mix to it to be able to barely hear. Use “Dirt” to add a bit of edgy presence for a less muddy mix. Use “Space” to emulate a nice room tone, helping to glue all elements together and cohesify punchiness. After balancing all track sends, unsolo the return tracks, reduce their levels to minimum, and slowly introduce them into the overall mix for added vibe and color. A next-level trick is to automate those levels to introduce more dirt and space during different song sections.

Master Busses
Place one of these on the master buss to subtly alter the overall character from digital neutrality to match the media of choice. These each have different controls. “CD” is for general-purpose, modern pre-mastering with an emphasis on the solidity of bass and the clarity of high frequencies. “Vinyl Record” adds in custom emulations of turntable rumble, stylus quality, and surface grime, also with RIAA pre- or post-equalization. “Cassette Tape” is equipped with a very nifty tape hiss generator which creates the hiss based on the original material as well as nonlinear subtle sub and air contour distortion.

Grab “Bussification” over at isotonik studios. Available now!

click on that

Over 420 free effect racks for free VST plugins… WHAT

EaReckon VST Rack.PNG
Due to an increasing upcoming workload, we’ve decided to release the freeVST racks all at once, instead of in monthly batches as originally planned. That’s over four-hundred and twenty individual racks now available! Talk about an expanded toolkit.

These are “default/template” audio effect racks for many different plugins which are available publicly for free in 64-bit. You simply load any of these Ableton racks, and it loads its corresponding plugin (assuming it’s installed). Each rack includes help text which will be shown when hovering over macro controls.

Most of the plugins we have racks available for have 32-bit and mac versions as well; however, some are 64-bit or windows-only. Mac-only and AU plugin racks are planned in the future. FreeVST racks here will be updated occasionally to reflect developer updates. If you know of a free vst developer we missed or encounter any issues, please leave a comment.

ABLETON LIVE 9.6 required (Intro, Suite, or Standard).
Yes, you can even use all of these racks with Live 9 Intro!

Continue reading