Tempo Dynamics

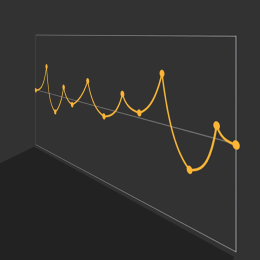
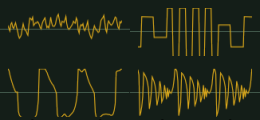
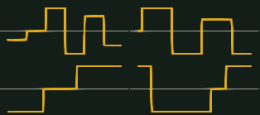
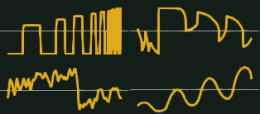
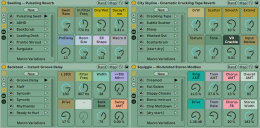
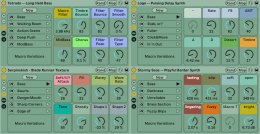
When applying dynamic effects, we are rarely going to need the entire timing ranges available, depending on the tempo, right? The new Tempo Dynamics pack provides go-to racks with minimum and maximum values hard-wired to ranges most potentially useful, given the chosen tempo — avoiding values that are likely too fast or too slow to be helpful.

Want to limit, squish, groovify, level, expand, or gate something? Reach for one of these racks in the nearest available tempo, and with handy knobs available to fine-tune, then dial it in quickly without worrying about the numbers or graphs… all while retaining the human element of your personal touch still in place. The macro knobs are also useful for automating in an arrangement, say to let something breathe more during one section and then clamp down during another.

I started devising these effect racks back when Live was still on version 9, so I’ve been testing them quite a lot over the last few years. They can be quite handy!


PACK CONTENTS

• 23 Tempo Compressors ranging from 20 to 240 bpm in 10bpm increments.
• 15 Tempo Expanders ranging from 25 to 235 bpm in 15bpm increments.
• 8 Tempo Gates ranging from 30 to 240 bpm in 30bpm increments.
• 12 Tempo Gluers ranging from 20 to 240 bpm in 20bpm increments.
• 23 Tempo Limiters ranging from 20 to 240 bpm in 10bpm increments.
• Bonus for Live 11: 23 Tempo Multibanders ranging from 20 to 240 bpm in 10bpm increments.

The Tempo Dynamics pack costs a paltry $10.83USD
… however, until March 14, 2023, it is free!
Grab it here from Isotonik Studios.


Continue reading

New Years 2023 Freebie: “Introspection” Pack.

Effect Racks for Live Intro.

‎‏‏‎ ‎‏‏‎‎‏‏‎ ‎‏‏‎ ‎ ‎Since my son has now acquired Ableton Live 11 Intro, I thought it would be interesting to make a pack of effects that utilize only effects native to that iteration of the software. These include Audio Effect Rack, Auto Filter, Auto Pan, Beat Repeat, Channel EQ, Chorus-Ensemble, Compressor, Delay, EQ Three, Erosion, Gate, Grain Delay, LFO, Limiter, Looper, Phaser-Flanger, Redux, Reverb, Saturator, Tuner, and Utility. This is no paltry collection to smirk at! Quite a range of possibilities. But also — a nice change of pace, being arbitrarily limited in options according to what I am used to as a rack craftor. I saw it as an exciting challenge. At the end, I’m super proud of what I’ve come up with. Methinks I’ll definitely be using these racks in the full version of Live 11 Suite aplenty moving forwards.

~`~

-> Download the Introspection pack for Ableton Live Intro, Standard, or Suite <-

Read about the process of the device creation below.


Continue reading

Ableton Live 11 Key Map Guide & Template by PerforModule

The PerforModule Key Map Template for Ableton Live 11: mapping computer keyboard keys to as many potentially helpful functions as practical.

The Template

There are three parts to the template:
•a Live Set pre-loaded with the recommended key mappings,
•a Diagram showing color-coded key functions, and
•a Spreadsheet listing custom-mapped and built-in key mappings, also explaining some quirks.

~`~

Mosey on over to this dropbox folder to download the Key Map Template Live Set, Key Map Plan Diagram, and Spreadsheet Guide. Read on for nauseatingly meticulous details below.

Continue reading

Dither Presets for Metal

(intro)

It’s a set of free presets for Dither, optimized for the Metal genre.

They were made for the mastering of the upcoming metal album, Lust & Insecurity by Animus Invidious.

Noise-shaping dither algorithms are theoretically optimized to “bury” the noise in the frequencies you hear least, while avoiding so much in the preeminent tonalities (in this case, distorted electric guitars focused around 2.5kHz).

Download

You can DOWNLOAD HERE and open the .fxp presets using your DAW of choice. If you happen to use Ableton Live 11, you can additionally access the .adg Racks which allow for more easy snapping-to or fine-tuning of the intensity value.

⚠️ You are also going to need to grab the free TB_Dither_v3 VST2 plugin if you don’t have it already, which has been graciously set free amongst a slew of other awesome legacy TB plugins.

Continue reading

Parallel-Friendly Native FX Racks for Live 10+: “ParallAux”

Which Effects Work Best In Parallel?

So one day i got it in my head to figure out which of Ableton Live’s Effects are the best to use in parallel.

What is the criteria for this? Simply, which processes alter the phase of audio passing through them, either to the least degree, or in a nicely summable way.

Why does this matter? Because phase offsets, when summed in parallel with the original signal, will inevitably cause changes to the frequency contour. Sometimes slight amounts of this phase offset can add a nice creamy touch to the sound of things (and pretty much all analog gear causes it to some degree), but when being surgically technical like during the finalizing stages of a track, they are generally just not helpful.

An example of not altering phase at all is Live’s Compressor effect which is phase-neutral; it can be used safely in parallel with no unwanted frequency coloration whatsoever.

An example of altering the phase in a “nicely summable” way is Live’s Reverb. Technically, it’s altering the phase a whole bunch, but it’s doing so in a time-smeared fashion which results in far less likelihood of perfectly-lined-up frequency cancellations, and so, when at 100% wet, reverbs can be just fine to use in parallel, and are often preferred this way.

After carefully checking the phase response of all of Ableton Live Ten’s native Audio Effects, i came up with five distinct racks providing combinations of the most parallel-friendly native effects, optimized for specific purposes with maximal versatility of application.

~`~

>DOWNLOAD PARALLAUX via Isotonik Studios<

FREE! Requires Ableton Live 10 Suite +

>Download ParallAux PDF Manual<

Continue reading

PerforModule Recommends: Effects Order

While we all know that there is no such thing as a perfect or ideal FX chain order for all situations because it totally depends on context, i have eventually developed some general preferences for the order of effects in a signal chain. Recently updating all my templates for Live 11 has further honed my thoughts on the situation.

We can of course swap around the sequential ordering of effect devices, either for a specific intended result or as a matter of experimentation just to see if an alternate routing happens to sound better on given audio.

As usual when sharing my ideas, it is recommended that you not simply adopt the structure as presented, but rather that you test it out in practice and modify things over time to suit your particular style, keeping notes and updating your own templates as you go. Maybe you think the way i place transient shapers before compressors is idiotic. That’s totally fine!

I’ll share below my go-to effects order, and (most importantly)… WHY.
While some of the choices are probably pretty unorthodox, none of them are arbitrary; they all have reasons. Are they bad reasons? Good reasons? Who knows. But i like to think they are built on logical rationale.

Keep in mind you’re seldom if ever going to need all these types of effects on any single track, but for times when you are using even two different processor types, some guidance as to their ordering might prove useful. Resist the urge to add more effects to a chain just because you can. The fewer processors required to get a sound how you want, usually the better.

Scroll to the bottom for a handy cheat-sheet!

~`~

Continue reading

New series of Single-Purpose Racks for Ableton Live 11: “Zinglez”

𝒁𝒊𝒏𝒈𝒍𝒆𝒛 is a new series of individual one-dollar racks for Ableton Live 11 by PerforModule.

Simple and straightforward.
Just grab what the ones that entice you the most.
Ignore everything else!

Read about them below.

Continue reading

New PerforModule Pack: “Empathy”

EMPATHY is a pack for Ableton Live 10+ Suite containing a handful of high-end effect racks designed to consistently improve a wide possible range of audio sources passing through them. Each rack is suited to a particular purpose, with easy-to-dial-in controls. Together they provide a robust toolkit for general mixing and mastering.

Contains:

Ultimatum: “The ultimate” audio effect rack designed by PerforModule, it’s a 10-step algorithm to magically improve both the tone and dynamics of any audio source in realtime.

The One’: One-stop shop for suave, go-to tonal adjustment of tracks in a mix, with low & high cut focus, “light shine” focus, surgical slice, l-r twist, and M vs S intensity.

Auditory Miximizer: The PerforModule twist on the infamous sonic maximizer, with tastefully optimized frequency contours and dynamic reactivity. Comes in 3 versions: stereo, L-R, and M-S.

Dilation Warder: Combination gate and expander for when you want to increase the dynamic range, tighten things up, emphasize punch, and add more of a percussive, staccato feel.

~`~

Skip to the bottom of this post to check out a video overview of Empathy by Brian Funk, or read on for a more detailed overview of each the included devices and what makes them special.

Continue reading

Freebie: “Golden” Multiband Presets

   Multiband Dynamics Processors. Such Beasts. So Much Power. So Easy to Abuse.

   During experimentation for a different purpose (making the “ultimate audio effect”… stay tuned), i got carried away and made “Golden” presets for a bunch of Multiband Dynamics plugins.

So what are Golden Multiband presets?
   I’m glad you asked. The basic idea is to sculpt an audio source to be less like white noise and more like golden pink noise. So what is golden pink noise? A modification of pink noise that is colored by the “goldilocks curve”.

   For most of the “Multiband Dynamics” type processors i own (see brief reviews of many of them in this recent post) i’ve crafted a “Golden” preset.

   Since most music follows more of a pink noise curve than a white noise curve to begin with, applying the full effect is far more likely to have a “warming, thickening” effect than a “brightening” effect, though it does depend on the particular source and plugin.

   However, you’ll notice that if you compare a golden multiband preset applied to an audio part — as compared to a similar, static EQ curve, that they feel less “murky” than they do “bulky”. The Pinker rack is included in the “Xtras” folder to test this concept with quick A/B tests.

   For evenly balanced to bright mixes, a golden dynamic preset can be perfect to smooth things out and add a dash of debonair; for mixes that are already leaning on the darker side, they can still be helpful for adding in a grounding touch of solidity— but in these cases should usually be used to a more subtle degree.

   I’ve fashioned such “Golden” presets for the following plugins:

~TB Broadcast*
~Brainworx bx_dynEQ V2
~Brainworx bx_XL V2
~ProAudioDSP DSM V3
~HOFA Dynamic Tilt
~Waves F6
~GVST GMulti*
~VoS Limiter6*
~VoS Nova67P*
~TDR Limiter6 GE
~
Ableton Multiband Dynamics
~TDR Nova*
~TDR Nova GE
~Xfer OTT*
~Klevgrand Pressit
~Newfangled Punctuate
~IK Quad-Comp
~Sonic Anomaly Quadracom
~Reaper ReaFir*
~Reaper ReaXcomp*
~W.A. The King
~Max for Cats TriComp
~Acoustica VioletCM
~Freeverb3 WindCompressor*
~Beatassist X-Press*

   Since each plugin has different functionality, the exact curvature varies between them (which gives them individual character). Some, for example, have no low- or high-cut capabilities and so retain more of those frequencies. The dynamic behavior of each also differs, so they may affect various material dissimilarly (especially the ones that have upward in addition to downward compression!).  What all the presets share in common, however, is a basic sculpting which is more likely to help than hinder your overall tone for consistent playback on different speaker types. The more you use them, the more you’ll get a feel for the unique quirks of each.

~`~

DOWNLOAD THE “GOLDEN DYNAMICS” PRESETS HERE
golden dynamics

   Provided both as Audio Effect Racks for Ableton Live 10+ (.adg) and as vst presets (.fxp for VST2 or .vstpreset for VST3), organized in folders by type.
   They load the same presets, but the Ableton racks are also hard-wired with some useful macro mappings for quick knob twisting of the most relevant parameters.

   You can either grab the zip file with everything in it, or you can only grab the specific presets for the plugins you own. I would probably recommend that latter strategy. There is also a pdf user manual which includes links to all the plugin vendors.

   When both VST2 and VST3 versions of a particular plugin are available, i’ll provide both .fxp and .vstpreset extension types, and the Live rack will load with the VST3 version, with sensible macros mapped for easy access. When no VST3 version is available, the rack will load the VST2 version instead.

USE WITH ANY DAW
   You should be able to use the .fxp and .vstpreset files with any DAW, as long as you have the given plugin installed.

Nifty Tip: I just recently realized that .vstpreset files can be dragged directly into a track in Ableton Live to load a plugin, just like any Live rack, which is super cool.

CAVEATS:

Designed for busses or the master channel more than for single tracks:
   Since the goldilocks curve upon which golden pink noise is based was formulated based on analysis of complete songs, these “golden” dynamic presets are not always appropriate for application on individual parts, suited more for groups or the master channel. But if you’re having problems with a certain track in a mix, one of them just might be the ticket.

Based on Flat as a Starting Point:
   If your mix is basically following a pink noise curve or leaning towards white noise (flat), golden dynamics presets tend to work pretty well at tasteful overall tone shaping. If your mix is already on the dark side with the top quite rolled off, however, they might make it too dark, in which case you may want to apply less of the effect, or add some top-end brightening to counter-balance.

Calibrated to -16 LUFS Integrated:
   These presets are designed to give a perfect frequency contour when applied to material which has been loudness-normalized to -16 LUFS integrated. Since dynamics processors utilize level thresholds, setting a base target level was essential. For optimal results, first make sure the audio feeding into it meters at or close to -16. You can still use the presets on louder or quieter material, but you might have to fiddle with controls to fine-tune the results to be optimal.
   Why -16LUFS? It’s my go-to loudness level for mixdowns and audio playback, giving a solid degree of punch with enough headroom for mastering. By getting in the habit of mixing down all of your songs to (and listening to all reference tracks at) -16LUFS (or whatever reference you decide upon), you can develop a more clear objective grasp of the relative spectral contours between them than you would when listening to tracks at erratically differing average levels.

You need to own the plugins!
   A given preset will only work if you have the corresponding plugin it uses installed in your system and recognized by your DAW. Don’t have any of these? You can fix that… the ones with *asterisks* in the list above are free!

   Interested in the “Goldilocks Curve” this was based on? It is contained within the “DynaMixing Ultimate” mega-pack for Ableton Live 9 along with a crap-ton of other carefully-crafted, highly usable effect racks.

   Interested in the upcoming magical device that adjusts dynamics and tone to make everything just wonderfully better? Stay tuned!